Certificates
Requirements
- Pocket installed
- Connectivity on TCP port 4433 or 443
Console
The certificate configuration defines the interaction between the private keys in the HSM and the certificates known to Windows.
Windows applications usually only interact with the certificates. The CSPs ( Cryptographic Services Providers) interface these certificates with the devices that store the private keys (such as HSMs and USB tokens), so it is important to understand how the environment is, and to know, for example, if a particular private key in the HSM has its certificate recognized by Windows.
Because of the way the Windows system architecture works, having the key and certificate loaded into the HSM does not automatically make them available to applications. The graphical console tries to leave as many steps as possible automated, but some user intervention may be necessary.
The configuration made via the graphical console remains in the user's scope (profile) and is therefore only valid and recognized for applications running under the current user's profile.
To use the settings in the Certificates option, you need to connect to the HSM. If there is no HSM user account already set up, the console will prompt you for one.
After connecting to the HSM, the console will display the following information at the top right:
- Dinamo Networks cloud connection status
- Telemetry status
- Model
- Serial number
- Firmware version
- Remote management status
- IP address
- User name (from HSM)
Warning
Integration with the cloud is optional and does not interfere with the normal operation of the HSM. If you are not using telemetry for the cloud, you can ignore the warning messages listed in the title bar.
The environment configuration options are grouped into tabs:
The other options are direct actions:
- Start screen
- Exit
When loading the Users and Certificates settings, the console will scan the environment and look for possible relationships between private keys and certificates that can be configured automatically.
Certificates


The relationships between private keys, certificates and providers are managed using the options below.
To import a PKCS#12 certificate file (.pfx) into the HSM, use the Import button. Select the file and enter a name and password. The name will be used to identify the key in the HSM, the certificate will have the same name as the key suffixed with _cer. When a PKCS#12 file is imported, the certificate is automatically associated with the HSM's cryptographic service provider (CSP).
If the HSM is configured for telemetry with the Dinamo Networks cloud service, you can view the certificate usage report directly on the services website. The Usage report button opens a new window(default browser) on the certificate usage report page. You may need to log in to view the report.

To issue a certificate directly with a Certificate Authority (CA), use the Issue via CA button and select the CA. Each CA has its own policy on the documents and procedures required to issue a certificate from a key in the HSM, so this process must begin with prior contact with the CA. Check in the installed version of the graphical console which CAs are available.
On the refresh button, the console will scan the environment and look for possible relationships between private keys and certificates that can be configured automatically. This scan is also carried out whenever the Certificates option is selected on the main screen.
The columns in the certificate table can be resized, repositioned and sorted.
The search field performs a textual search in the table rows, is case-sensitive and allows the use of wildcards with *.
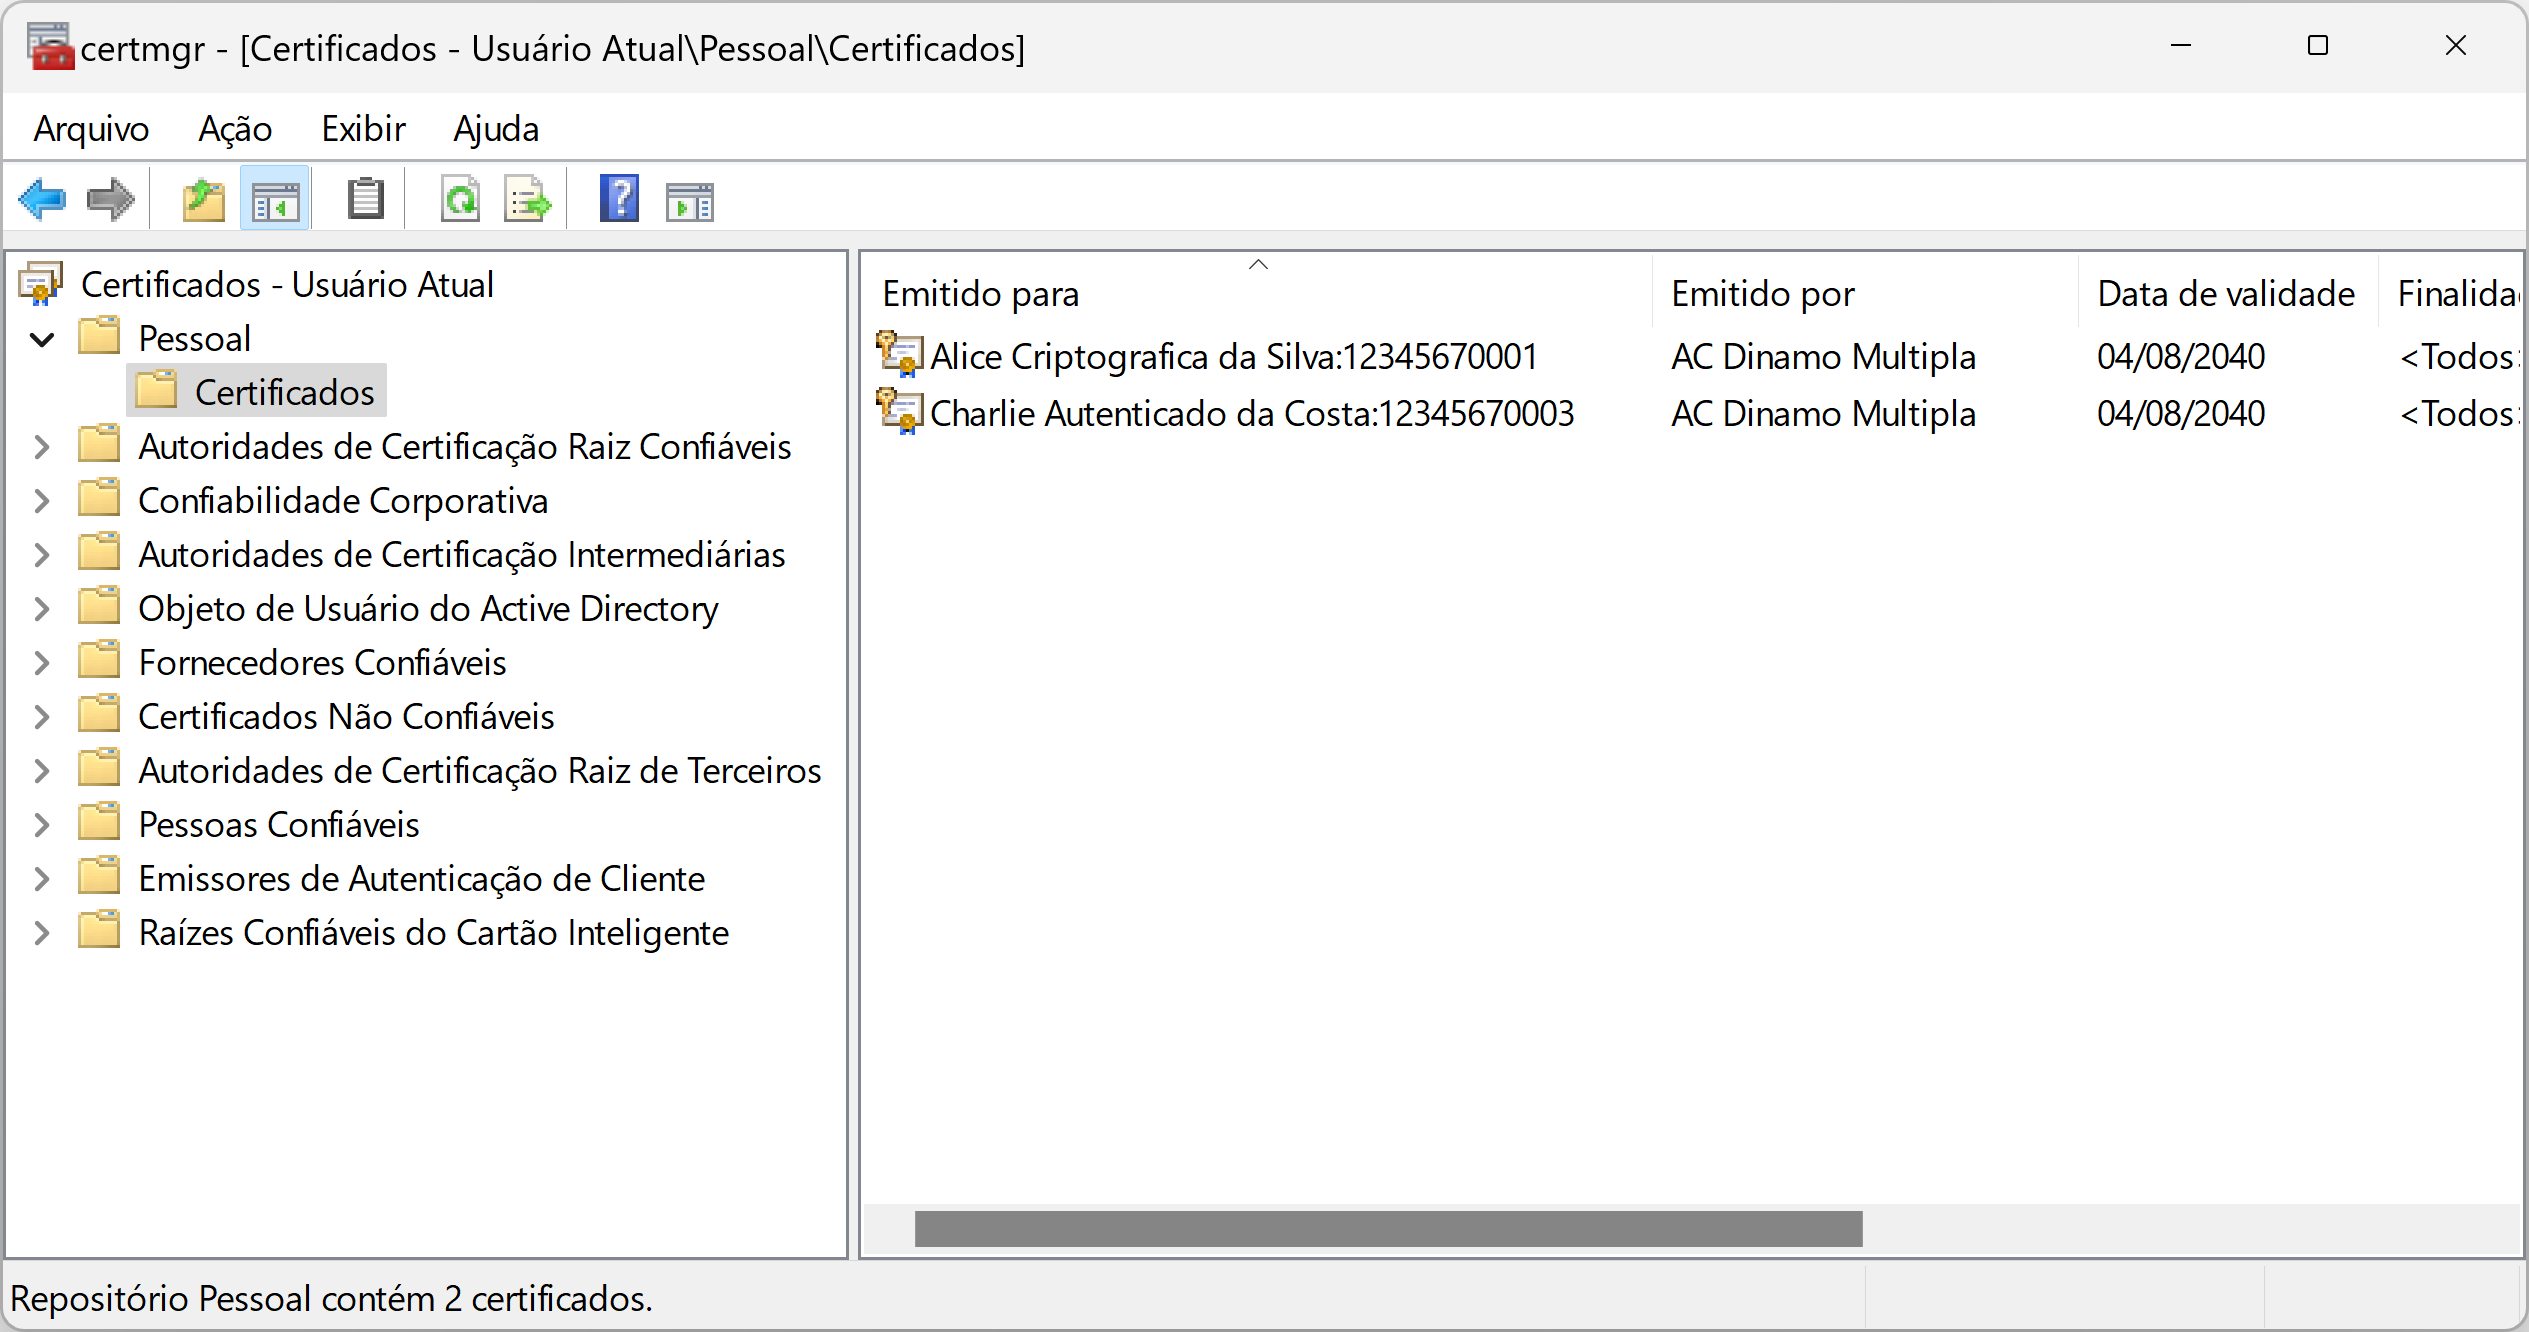
Columns:
- Issued to
- HSM
- Windows
- Cloud
- Expiration date
- Private key in HSM
- Private key in the Cloud
- Key provider
- Container
- Digital printing
The actions in the table are triggered in a pop-up menu via the right mouse button. Depending on the status, the following options are available for each certificate:
- Open
- Enable
- Disable
- Enable all
- Disable all
- Upload to the cloud
- Switch to HSM provider
- Switch to a cloud provider


Open Console HTTP
The Open HTTP console button opens a new window(default browser) with the initial login screen of the HSM HTTP console. For more details on the console, see the HTTP Console topic.


Open Windows Certificates
Open Cloud Console
Displays the account currently configured and connected to the Dinamo Networks cloud service. You can change the account or close the session.
To stop sending telemetry from the HSM to the Dinamo Networks cloud service, use the Unlink HSM from cloud button.
To import certificates that are in the cloud into the HSM, use the Import certificates button. Only the certificate is imported, not the private key.
Warning
Integration with the cloud is optional and does not interfere with the normal operation of the HSM.